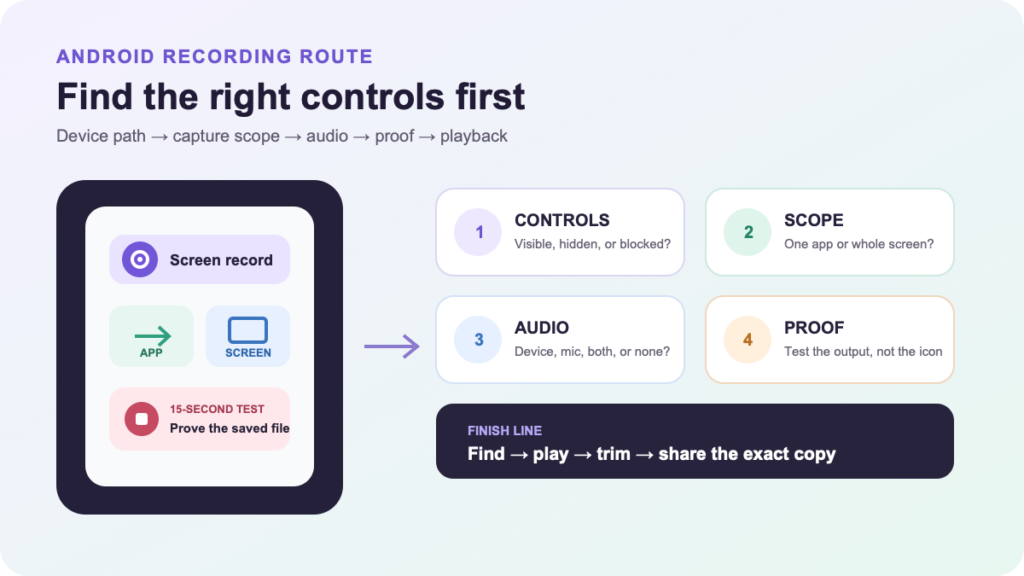
A device-aware Android screen-recording route from Quick Settings to a verified, shareable clip.
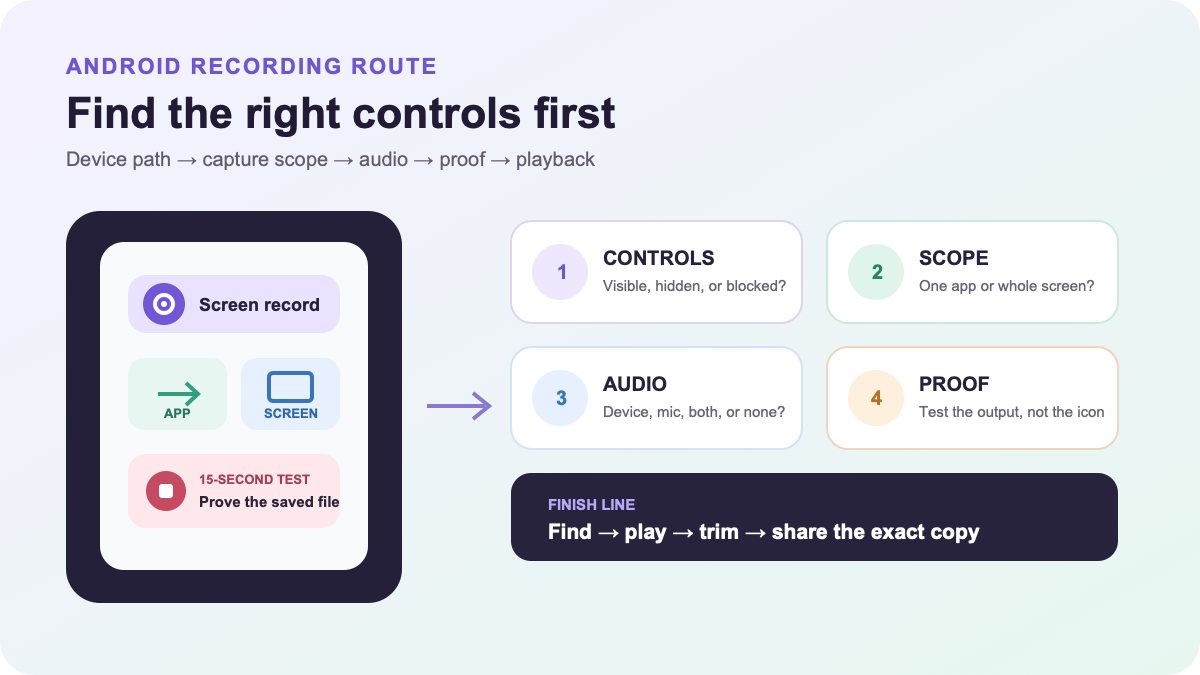
Can you see Screen record after swiping down twice? If yes, tap it, choose whether to capture one app or the entire screen plus the audio and touch options you need, and tap Start. Stop from the recorder notification or on-screen control. If the tile is missing, check the other Quick Settings pages or tap Edit and add it. Manufacturer menus and supported features can differ, so make a 15-second test and find the saved clip in Google Photos or the manufacturer’s Gallery before recording the full task.
The generic sequence is short; the device branch is what causes most confusion. Pixel follows Google’s current Android path closely. Galaxy uses Samsung’s Quick panel and adds its own settings. Other manufacturers may rename the tile, move it, or omit it on a particular model. A work administrator or the app itself may also block capture.
Find the recorder that belongs to your phone
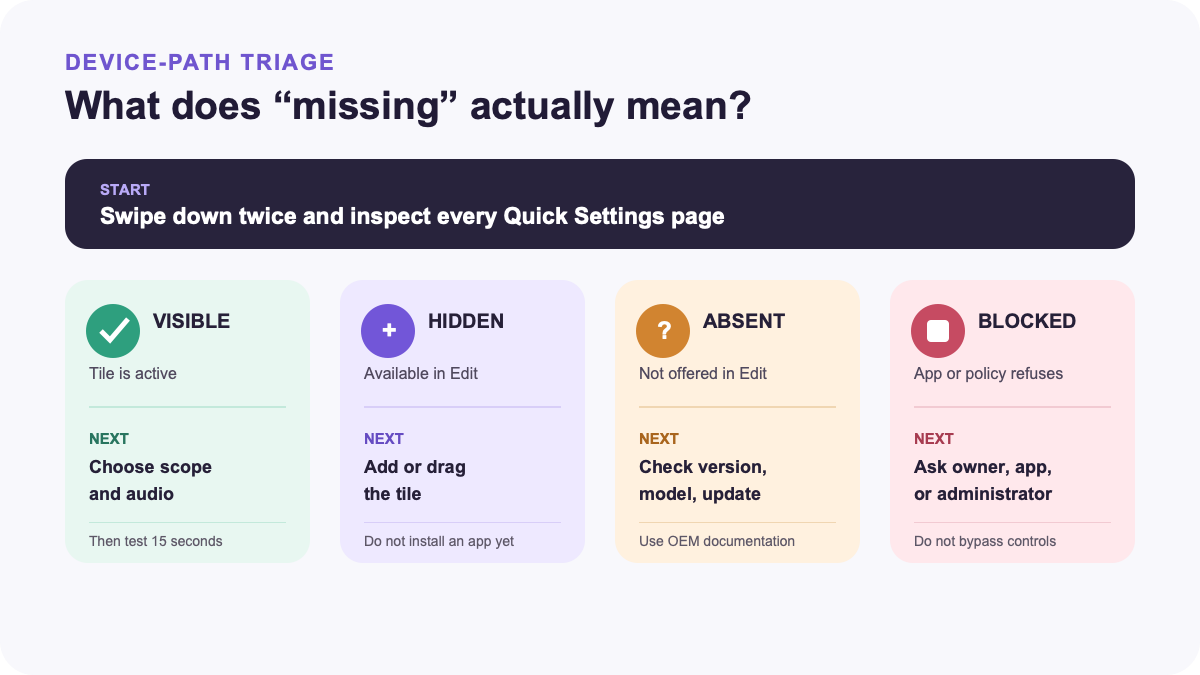
- Confirm the device family. These instructions are for Android phones and tablets. For Apple hardware, use the iPhone screen-recording path. If the task is on a computer, follow the Mac recording workflow instead.
- Open all Quick Settings. Swipe down from the top once, then swipe down again. Look across every Quick Settings page for Screen record, Screen recorder, or a manufacturer-specific translation.
- Expose a hidden tile. On the Google path, tap Edit, find Screen record among available controls, and drag or add it to the active set. Google’s current Quick Settings guide documents adding and moving controls, although exact icons can vary by Android version.
- Use the manufacturer path. On a current supported Galaxy device, open the Quick panel and tap Screen recorder. Samsung places longer-term options under Settings > Advanced features > Screenshots and screen recordings. Other brands may use a different menu, so consult the support page for the exact model and software version.
- Classify an absent control. If Screen record is not even available in the edit panel, check the Android version, pending system updates, model support, and whether the phone has a work profile or device-management policy. Do not assume that a random recorder app can override a system or organizational restriction.
Google’s general Android instructions use the double-swipe, Screen record tile, Edit-panel, countdown, and stop-notification sequence. Google notes that some Pixel steps require Android 11 or later; Samsung separately says support can depend on the Galaxy model. “Android phone” therefore does not prove one identical interface.
Choose one app or the entire screen
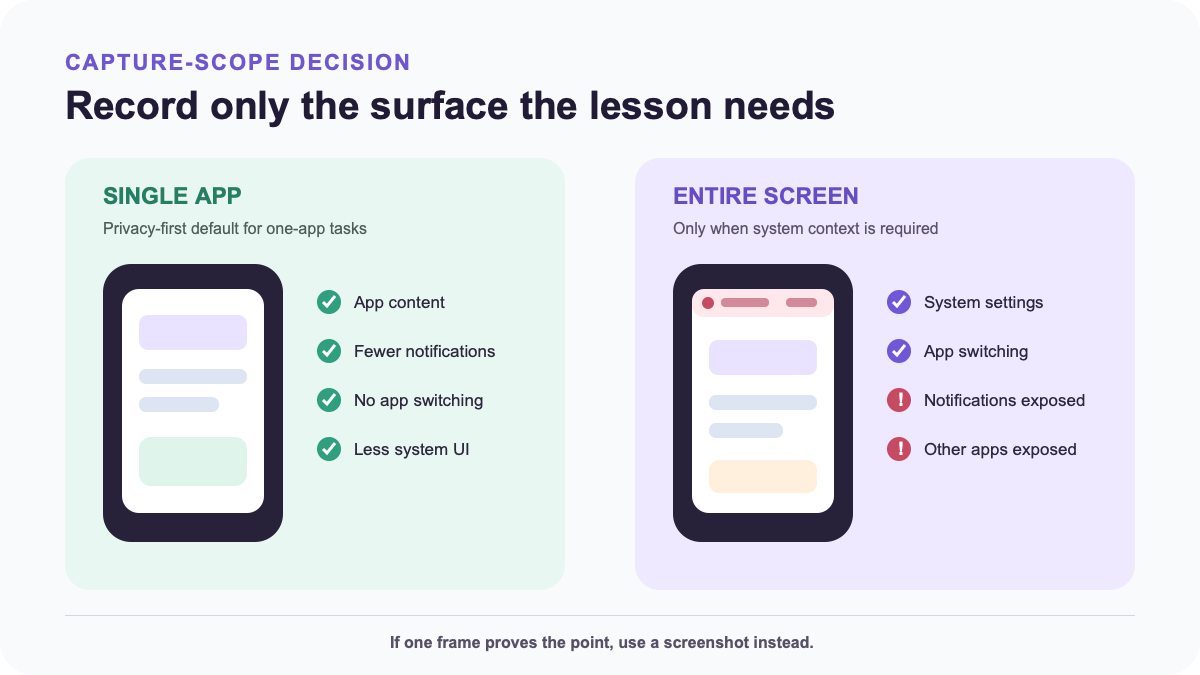
On current Pixel software, the recorder can offer A single app or Entire screen. Android 14 QPR2’s app-screen-sharing design excludes the status bar, navigation bar, notifications, and other apps from the captured display. That is the safer default when one application contains the whole demonstration. Availability and wording can still differ on non-Pixel devices.
| Capture need | Choose | Exposure you avoid | What the clip cannot show |
|---|---|---|---|
| Demonstrate one app without leaving it | Single app | Most notifications, system UI, app switcher, and unrelated apps | Cross-app steps and some system context |
| Show settings, app switching, or a complete device path | Entire screen | Nothing outside your preparation; the capture surface is broad | Nothing by design, but protected content may still be blank |
| Prove one static state, error, or confirmation | Still image | Audio, motion, intervening screens, and unnecessary duration | The sequence that produced the state |
| Help someone interact in real time | Live screen share | A stored local video when the session is not recorded | An asynchronous artifact unless the meeting is separately recorded |
If one frame proves the result, take a screenshot instead. If another person needs to ask questions and guide the task live, use an approved Zoom screen-sharing session or the organization’s supported meeting tool. Recording and live sharing solve different handoff problems.
For an entire-screen take, prepare the surface before the countdown: silence nonessential notifications, close private apps, hide account identifiers, move passwords and one-time codes out of view, and set the final orientation. Use example data for a tutorial instead of planning to blur secrets later.
Route device audio, microphone, and touches separately
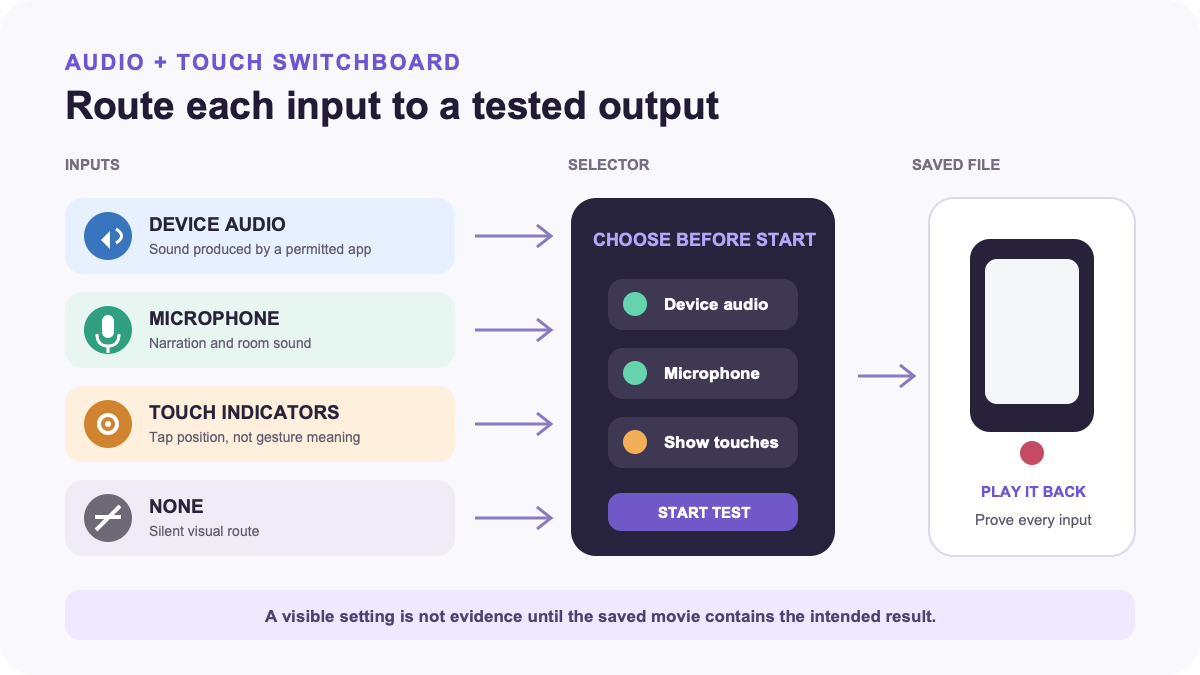
The labels vary, but treat the screen, device audio, microphone, and touch indicators as separate inputs.
| Final clip needs | Starting choice | Proof in the test take | Common false assumption |
|---|---|---|---|
| Silent visual instructions | No audio; show taps if they help | Every action is understandable without speech | The app will stay silent merely because the microphone is off |
| Sound produced by the app | Device audio | The saved movie contains the app sound at a usable level | Every app permits internal audio capture |
| Your explanation | Microphone | Your voice is clear and no private room conversation appears | Microphone means the app’s own sound is included |
| App sound plus explanation | Device audio and microphone, if offered | Both tracks remain intelligible without echo or masking | The two sources will balance themselves |
| Visible tap locations | Show touches or taps | Indicators appear where actions happen and do not obscure controls | A touch dot explains a swipe direction or long press by itself |
Google’s Android help says users can choose audio and whether to show touches before starting. Current Pixel documentation additionally describes device audio, microphone, and—on supported devices and software—a selfie-camera overlay. Samsung exposes its own sound and quality settings. Treat any manufacturer-specific option as a capability to test, not a promise for every Android device.
If narration is inappropriate or cannot be captured reliably, record a clean visual and add subtitles with a deliberate caption pass. Captions still need timing, spelling, speaker, and on-screen-text checks; they are not a substitute for verifying the source clip.
Make a 15-second proof take
Do not make a six-minute tutorial as the first test. Use one short take that crosses every boundary the real recording will use:
- Put the phone in the intended orientation and open the safe starting screen.
- Swipe down twice, tap Screen record, and choose the real scope, audio sources, and touch setting.
- Tap Start and wait for the countdown to finish.
- Speak a short phrase if the microphone matters, play a permitted app sound if device audio matters, tap one control, scroll once, and switch apps only if the final scope requires it.
- Stop from the notification or recorder toolbar. Do not lock the phone or open a private screen merely to end the take.
- Find the saved video, play it from the beginning, and inspect picture, orientation, touch dots, both audio sources, and the final frame.
The proof succeeds only if the saved file contains the intended evidence. A visible microphone icon, audible sound during recording, or on-screen red indicator does not prove the output track is correct. If the test fails, change one variable and repeat: scope first, then audio, then the target app.
Stop, find, and trim the saved clip
On Google’s Android path, stop by swiping down and tapping the Screen recorder notification. Current Pixel guidance uses the same notification route. On Galaxy, the floating toolbar can pause or stop the take. A sudden lock, restart, battery failure, storage shortage, or policy action may end a session differently, so confirm that a playable file exists before recreating the task.
Google directs users to Photos > Collections > On this device > Movies. Samsung’s current guidance points to the Screen recordings folder in Gallery and lists Internal storage > DCIM > Screen recordings as the default file path on supported devices. If neither path matches, search the manufacturer Gallery, Files app, or the recorder’s settings rather than concluding that the take vanished.
Trim setup and stop footage in Google Photos:
- Open the saved movie and tap Edit.
- Drag the trim handles around the useful interval.
- Play the new beginning and ending so the first action and final result are still present.
- Tap Save to create the edited copy, preserving the source until delivery is verified.
Google’s current video editor also offers crop, rotate, mute, and other features subject to device requirements. Use only what the handoff needs. If the built-in editor cannot meet a named requirement such as multiple cuts or detailed annotation, browse editing and repurposing tools after preserving the original.
Diagnose the failure by its signal
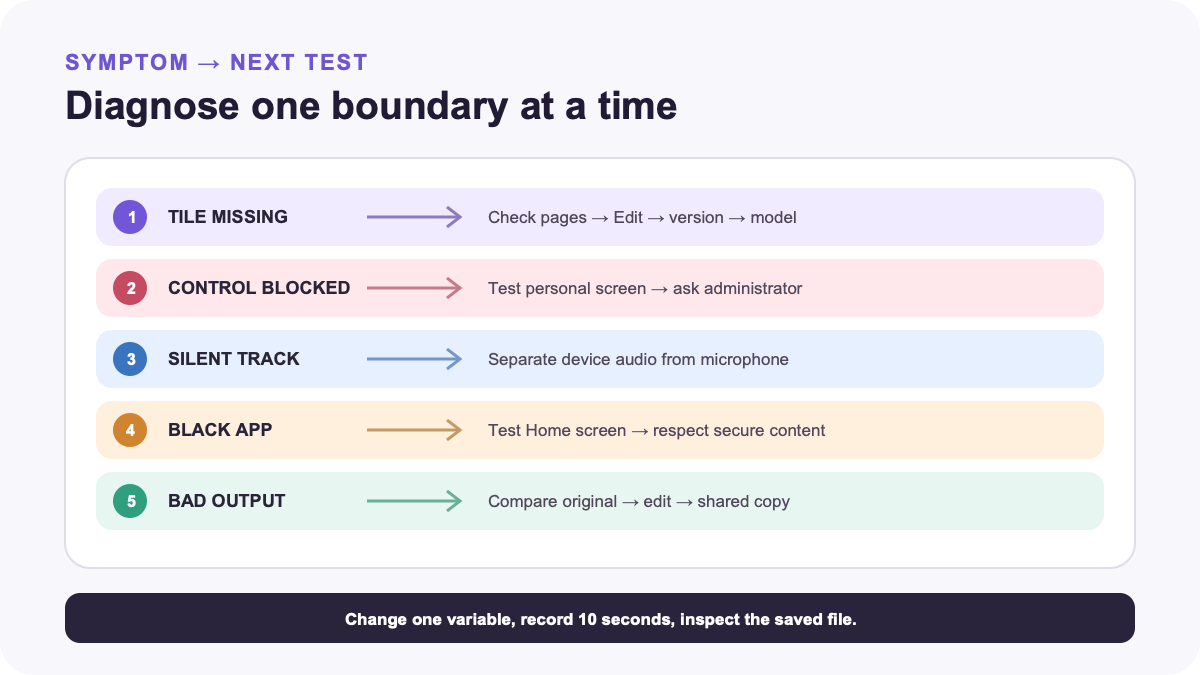
| Signal | Smallest next test | Correct route |
|---|---|---|
| Screen record tile is missing | Swipe through every Quick Settings page, then open Edit and search available controls | Add the tile; if absent, check Android version, updates, model support, and manufacturer documentation |
| The tile exists but is disabled or a work app refuses capture | Try a neutral personal screen, then identify whether the phone or app is managed | Ask the administrator; Android Enterprise allows screen capture to be disabled at device or profile level |
| Microphone works but device audio is silent | Enable device audio and record a permitted neutral app | If only one app fails, respect its capture policy; if all fail, review device settings and manufacturer support |
| One app is black, hidden, or excluded | Record the Home screen or another permitted app with the same settings | Use the app’s authorized export or sharing route; Android’s FLAG_SECURE can prevent protected windows from appearing in captures |
| The recording stops or never saves | Make a ten-second neutral take and inspect free storage, battery state, and policy notices | Free appropriate space, stabilize power, update the system, or contact the administrator; do not repeat a long take first |
| Text is unreadable or the delivered copy looks blocky | Compare the original recording with the edited and shared copies | Trace the first pixelated copy before exporting again |
Android’s secure-window flag is a deliberate content-protection boundary, not a recorder malfunction to evade. Managed Android devices can also have screen capture disabled by IT policy. In either case, request an authorized file, export, or support path.
A third-party recorder is a last branch, not the first fix. Use only a reputable source, inspect permissions and data handling, and test with non-sensitive content. If an unknown recorder was sideloaded and the phone now shows suspicious overlays, redirects, battery activity, or permission behavior, scan the device workflow for malware indicators instead of granting the app more access.
Verify the exact file you will share
Open the trimmed or exported copy—not only the original—and run this acceptance test:
- The first useful action, every required transition, and the final result are present.
- Portrait or landscape orientation stays correct and text is readable at normal playback size.
- Device audio, narration, silence, and touch indicators match the intended mode.
- No notification, account name, message, location, code, or background conversation exposes unintended information.
- The filename identifies the task without adding confidential data.
- The recipient’s actual delivery method accepts the file and another device can play it.
A successful worked result is not “the red indicator appeared.” It is a 15-second saved clip that starts on the intended app, shows the chosen tap and scroll, contains the selected audio, stops cleanly, appears in the expected library, and still works after trim and delivery. Once that proof passes, record the real task with the same settings.
If the clip now belongs in a larger production, explore the video creation tool category. For another focused software workflow, continue with the tool tutorial library.