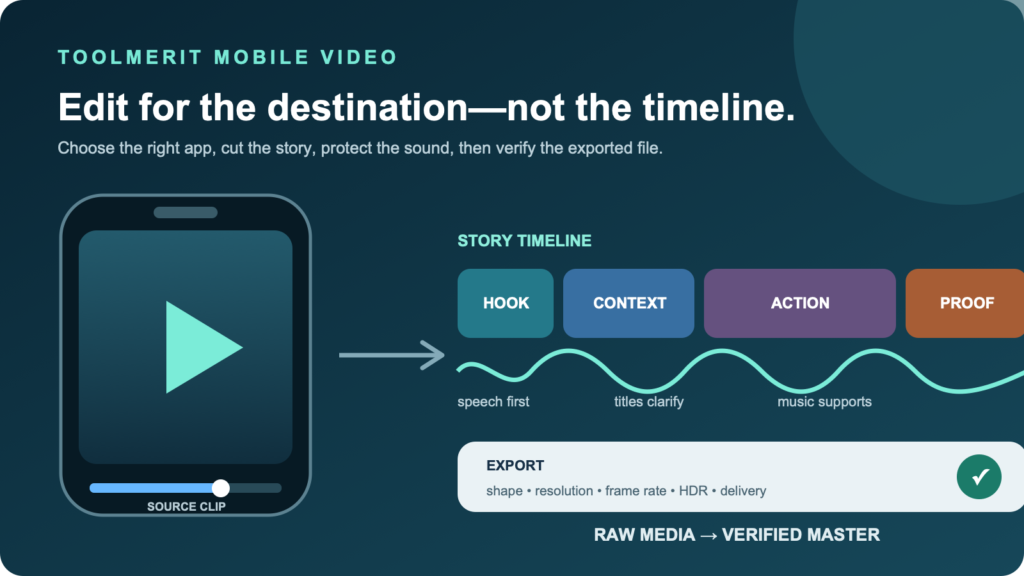
A practical iPhone editing route from app choice and story cut through sound, titles, export settings, and final playback checks.
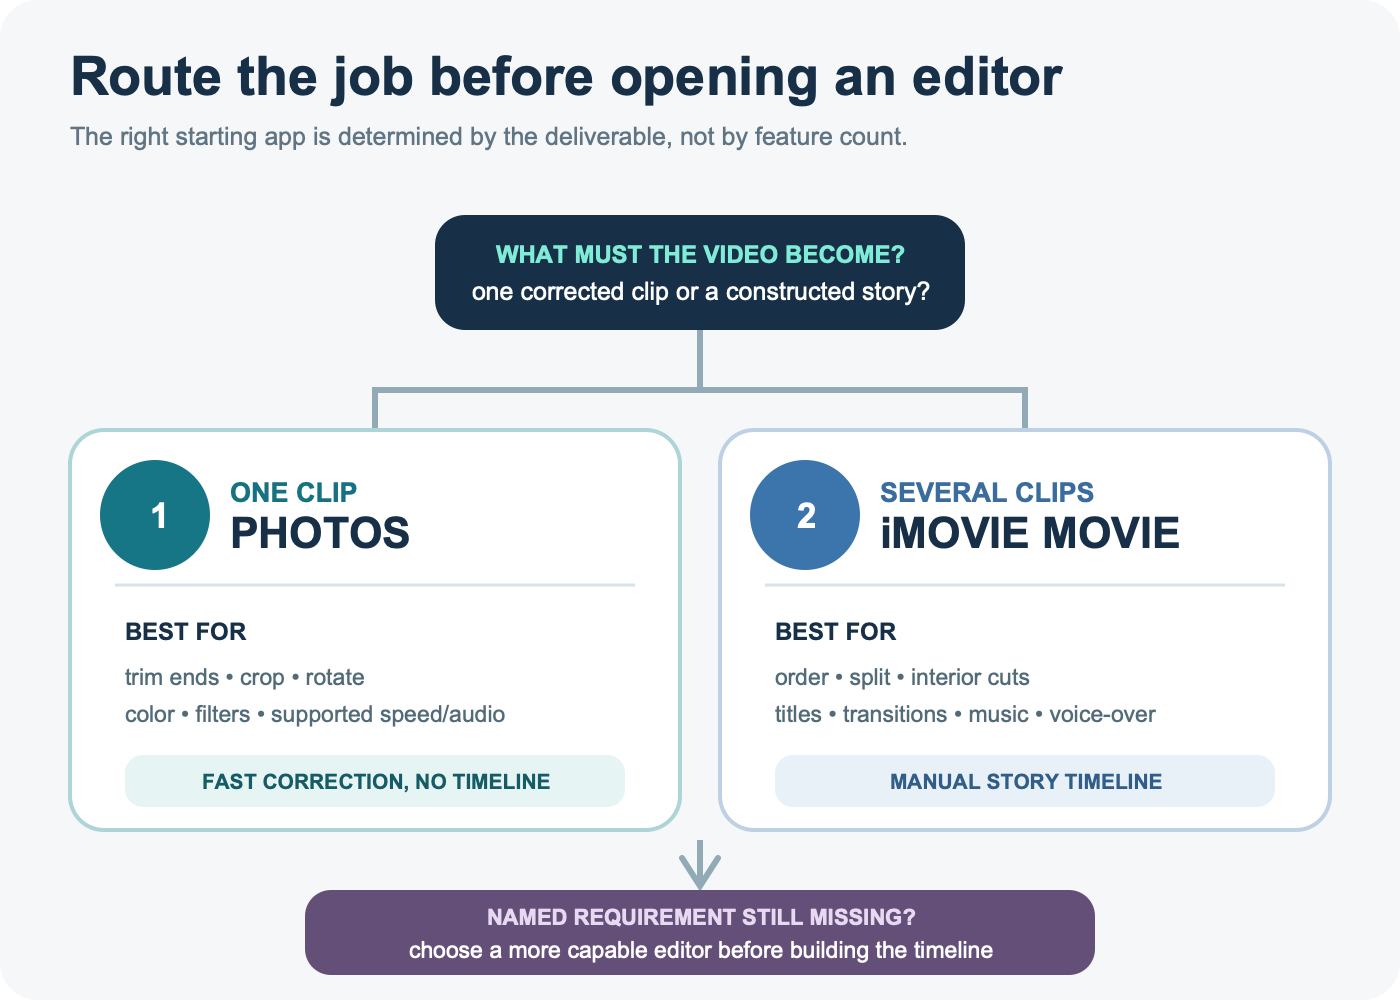
Start with the smallest editor that can finish the video. Photos is faster for correcting one clip. iMovie is the better Apple starting point when the story needs several clips, deliberate cuts, titles, transitions, music, or voice-over. Choosing the app by task prevents a quick trim from becoming an unnecessary project—and prevents a multi-clip story from being forced through single-clip controls.
For one clip, open it in Photos, tap Edit, trim the ends, adjust crop, color, speed, or sound when those controls are available, then tap Done and preserve a recoverable original. For multiple clips, titles, transitions, music, or voice-over, create a Movie project in iMovie, arrange and split clips on the timeline, balance the audio, preview the whole cut, then use Share Video and choose resolution, frame rate, and HDR for the destination.
This workflow takes a short video from raw media to a checked delivery file. It uses Apple’s current public documentation, but button availability can still vary with the iPhone model, captured format, app version, and project type.
Choose Photos or iMovie before touching the footage
Photos and iMovie overlap at trimming, but their working models are different. Photos edits an individual video already in your library. iMovie builds a project on a timeline, where several pieces can be ordered and mixed.
| Your actual task | Start in | Why | Route elsewhere when… |
|---|---|---|---|
| Remove dead time from the beginning or end | Photos | Direct trim handles; no project setup | You need to remove a section from the middle |
| Crop, straighten, adjust color, or apply a filter to one clip | Photos | The correction stays attached to the library item and can generally be reverted | You need the correction coordinated across a sequence |
| Combine clips, photos, titles, music, and voice-over | iMovie Movie project | Manual timeline control | A required caption, layer, animation, or delivery specification exceeds the available controls |
| Let the app assemble selected media quickly | iMovie Magic Movie | Automatic soundtrack and transitions with later customization | You need exact shot order and timing from the start |
Apple describes Movie projects as the iMovie option for manual organization and finer timeline control, while Magic Movie automates more of the assembly. If you can name a requirement that the Apple apps do not meet, choose from ToolMerit’s video creation tools before you build the timeline. If the missing job is specifically automated cleanup, generation, transcription, or repurposing, compare the narrower AI video tool category rather than changing editors halfway through.
Protect the source and define the destination
Before making a cut, answer four questions:
- Where will the video be watched? A vertical social post, a horizontal presentation, and a file sent for later editing are different deliverables.
- What is the target duration? A limit forces real editing decisions; “make it shorter” does not.
- Which audio must survive? Mark the spoken line, environmental sound, or music cue that carries meaning.
- What must remain recoverable? Preserve the original clips and keep the editable iMovie project until the delivery file passes review.
In Photos, Apple’s video trim instructions offer “Save Video” or “Save Video as New Clip.” Saving the edit to the original library item can be reversed with Revert; saving a new clip keeps both versions, but the new shortened clip cannot reveal frames outside its saved range. For a valuable take, the safer working habit is to keep the source and make the deliverable a separate file or project.
If the footage itself is an iPhone interface demonstration, capture it cleanly before editing. The iPhone screen-recording guide covers microphone choices, privacy checks, and the failures that otherwise force a new take.
Build a 45-second edit from five raw clips
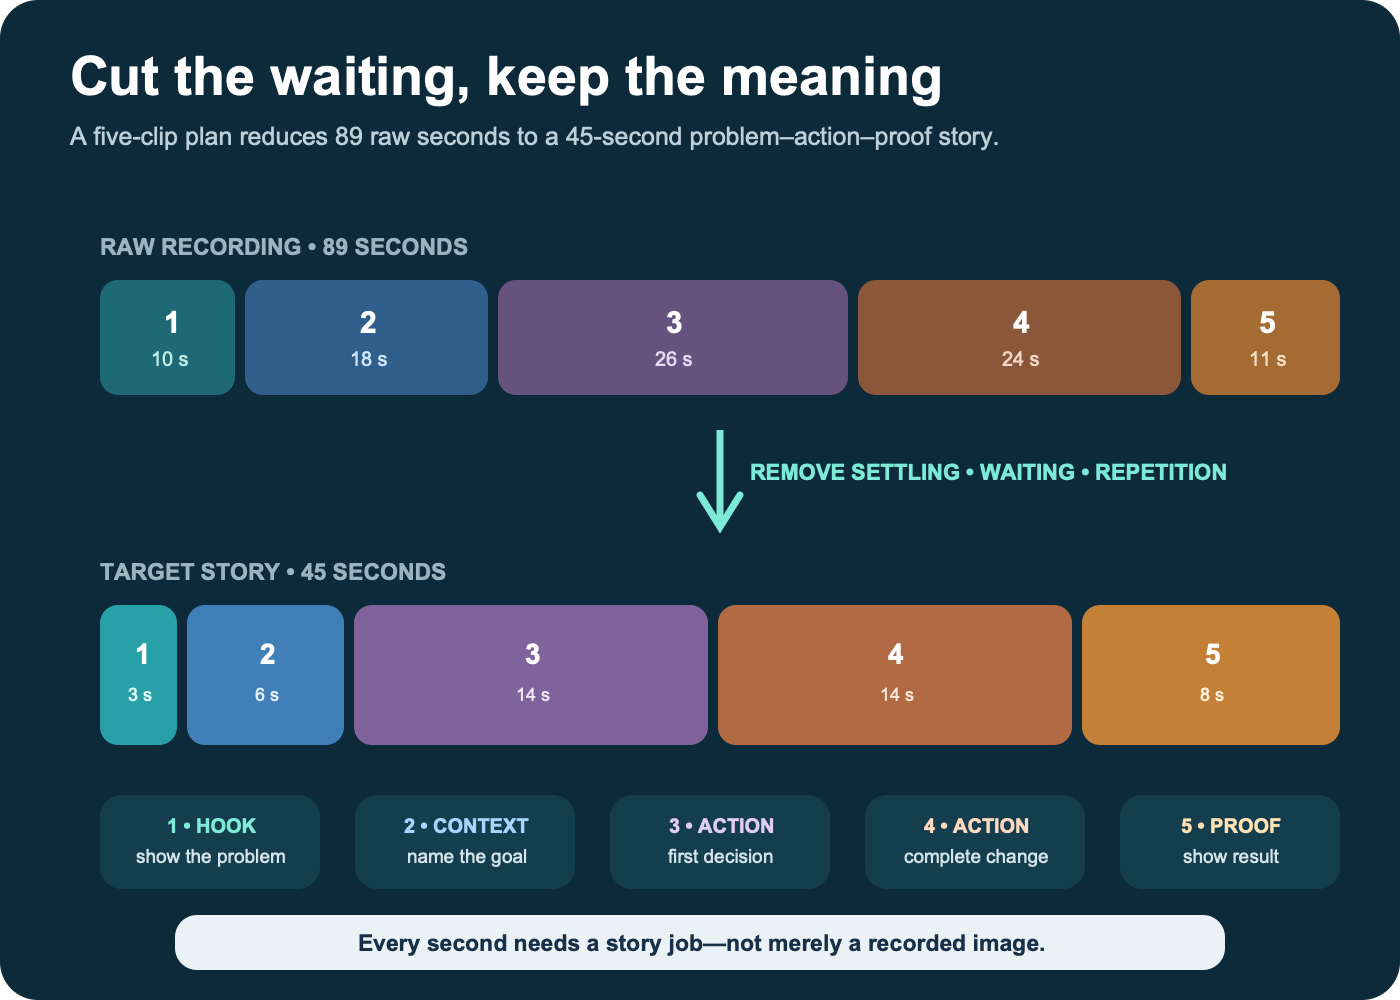
A timeline becomes easier when every clip has a job. Consider this hypothetical 89-second recording set for a short product demonstration:
| Raw clip | Raw length | Job in the story | Target length | Keep |
|---|---|---|---|---|
| 1. Problem shown | 10 s | Hook: show the unwanted result | 3 s | The clearest failure moment |
| 2. Setup | 18 s | Give only the context needed for the action | 6 s | One identifying detail and the goal |
| 3. First action | 26 s | Show the essential first step | 14 s | Finger movement plus result |
| 4. Second action | 24 s | Complete the change | 14 s | The decision point, not the waiting |
| 5. Proof | 11 s | Show the finished outcome | 8 s | Before/after contrast and final state |
The target totals 45 seconds: 3 + 6 + 14 + 14 + 8. That is a planning example, not a universal pacing formula. Its value is the job column. When a clip cannot justify its seconds, shorten it, replace it, or remove it.
In iMovie, tap Start New Project → Movie, select the five clips, then tap Create Movie. Apple’s Movie project instructions distinguish this manual route from guided Storyboards and automatic Magic Movies. Put the clips in story order before polishing any one clip.
Cut for meaning before adding style
Do one picture-only pass. Watch for the moment the information changes—not just a pause in the audio.
- Reorder. Touch and hold a timeline item, then drag it so the sequence reads problem → context → action → proof.
- Trim edges. Tap a clip and drag its yellow handles inward to remove camera settling, reaching for the stop button, and repeated words at the boundaries.
- Split the middle. Move the playhead to the start of an unwanted interior section, split; repeat at the end; delete the isolated piece.
- Close the gap in thought. Replay the join. If the viewer loses the subject, restore a few frames or insert a brief context shot.
- Prefer a plain cut first. Add a transition only when it communicates a time, place, or chapter change.
Apple’s arrange-and-trim guide documents dragging clips, yellow trim handles, splitting from the Actions control, and the downward swipe gesture over the playhead. A handle that will not extend farther usually means no additional source frames exist at that edge.
iMovie inserts transitions between clips by default. The transition controls let you tap the transition icon, choose None for a cut, or select another style and duration. A transition can require extra frames on both neighboring clips, so an unavailable duration is often a media-handle constraint rather than a broken project.
Picture-lock rule: If removing a clip does not change the viewer’s understanding, remove it before you spend time styling it.
Mix speech, music, and silence in that order
Audio should make the picture easier to understand. Build it in layers:
- Protect intelligible speech. Listen with the screen face down. If the main sentence is unclear, fix or replace it before adding music.
- Use original sound deliberately. Keep taps, movement, and environmental sound when they prove what happened; mute distracting camera handling or unrelated conversation.
- Add voice-over only where the image cannot explain itself. Place the playhead before the relevant action and record a short line that ends before the next idea begins.
- Add music last. Lower it until every important word remains effortless to hear. Silence is preferable to a soundtrack that competes with the message.
Apple’s iMovie soundtrack guide covers included soundtracks, music synced to the device, and audio imported from iCloud Drive. It also notes that protected files may be unavailable and that you must have the right to use a song. For recording, cleanup, podcast-style processing, or other work beyond the project mix, use the audio and podcast tools directory as a separate production branch.
Some Photos audio controls depend on how and where the video was captured. Apple documents Audio Mix for Spatial Audio recordings on supported models, with Standard, In-Frame, Studio, and Cinematic options. Treat that as a source- and model-dependent correction, not a control every iPhone video will show.
Add titles and transitions only after the story works
A title should identify, orient, or clarify. It should not repeat everything the viewer can already see. In iMovie, select the relevant clip, tap Titles, choose a style, then edit and position the text. Apple’s title instructions also cover size, font, color, lower-third positioning, and full-clip duration.
Use this compact text plan for the 45-second example:
- 0–3 seconds: one promise or problem label;
- 3–9 seconds: a short context label only if the object or app is not obvious;
- 9–37 seconds: labels for controls or steps that would otherwise be ambiguous;
- 37–45 seconds: result, next action, or source—not a second introduction.
Keep essential text away from the extreme edges, then preview it on the destination platform because controls, captions, and interface overlays can cover parts of a vertical or horizontal frame. iMovie titles are visual overlays; if the deliverable requires a full timed-caption workflow or a particular accessibility file, verify that requirement separately before treating a title style as a substitute.
When spoken content needs captions, follow the subtitle production and verification workflow after the picture edit is locked.
Export for the destination, not the phone
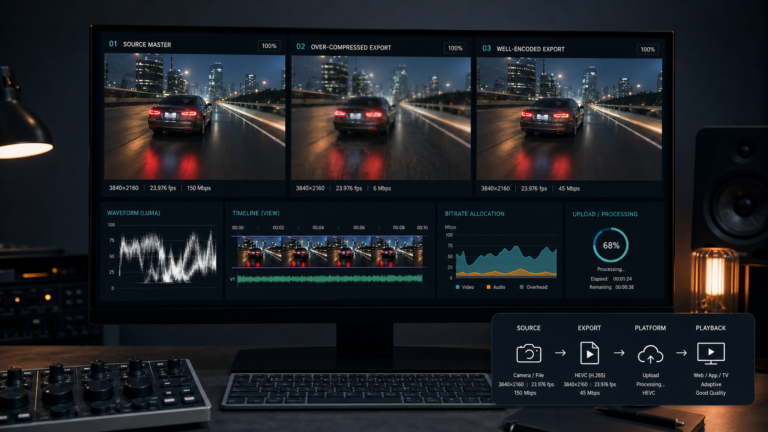
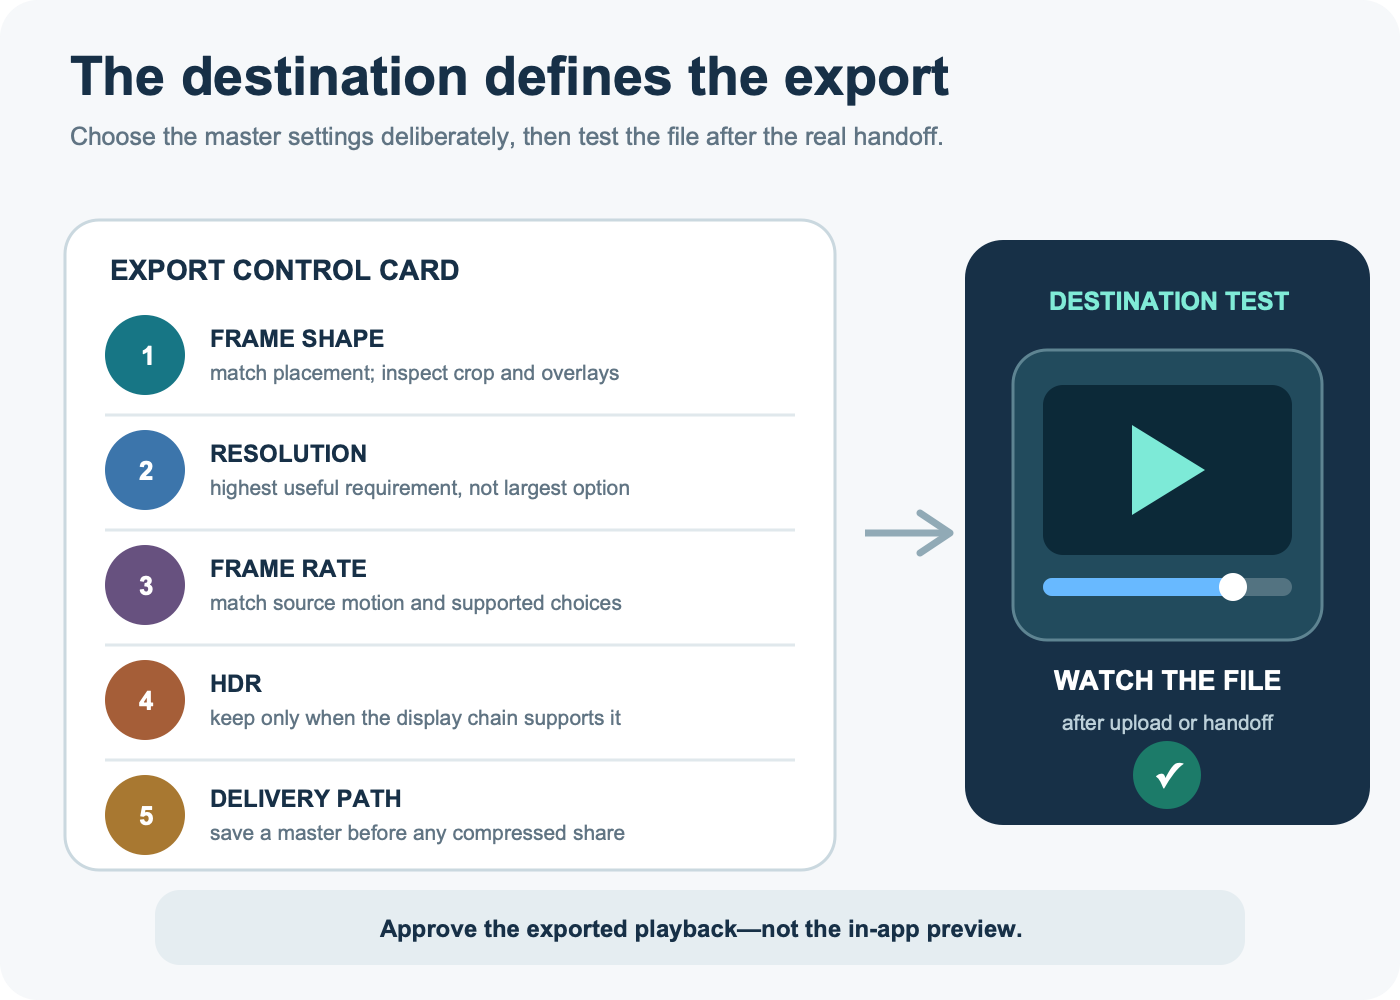
Finish the project by producing a master file first. In iMovie, return to Projects, open the Share control, tap Share Video, then inspect Options. Apple’s sharing guide documents resolution, frame-rate, and HDR choices when the source and project support them.
| Decision | What to match | What to verify |
|---|---|---|
| Frame shape and orientation | The destination placement | No unintended crop, bars, rotation, or covered text |
| Resolution | The highest useful delivery requirement, not merely the largest option | Detail survives after the destination processes the file |
| Frame rate | The recorded motion and supported export choices | Motion looks natural; no false promise that missing frames can be restored |
| HDR | The display and platform chain | Highlights and color look correct on the actual destination; turn HDR off for broader compatibility when needed |
| Delivery route | Master preservation versus quick communication | The sent file has not been unexpectedly downscaled |
Apple warns that sharing from iMovie through Mail or Messages can create a 360p, 30 fps copy regardless of the source. Save the master to Photos or Files first when quality matters, then upload that file through the destination’s preferred route. A social platform may recompress it again, so consult the relevant channel requirements through ToolMerit’s social media tools section.
Run a three-pass delivery check
Do not approve the timeline preview. Approve the exported file.
- Picture pass, sound off: confirm order, crop, titles, transition timing, orientation, first frame, and last frame.
- Sound pass, eyes away: confirm speech clarity, music balance, unwanted noises, abrupt audio cuts, and intentional silence.
- Destination pass: upload privately or preview through the actual handoff route; verify processing, overlays, color, captions, and playback on a second device when the delivery matters.
Keep the editable project and source clips until that third pass succeeds. If the video will be published, pair the verified file with accurate metadata; ToolMerit’s Video Title Generator can help explore title directions, but the final wording still needs to match what the video actually delivers.
The hypothetical five-clip edit now has a concrete result: an 89-second recording set becomes a 45-second problem–action–proof sequence, speech remains the audio priority, titles explain only ambiguous moments, and the saved master has been replayed through its intended route. That completed delivery—not the number of effects—is the measure of the edit.
If the delivered copy looks blocky or soft, use the pixelated-video diagnosis route to find the first degraded stage before exporting again.